Digital Workflow (Part 1) - Organising Your Files
 I'm now less than a day away from my annual trip with my photography friends. As always each year I'm very excited and currently counting down the hours. I realised that weather permitting I'll generate 1,000 plus digital photograph's in the next four days. This scary thought made me consider digital workflow.
You will soon find that thousands of digital photographs on your PC at random can become a huge headache. Files get lost, impossible to find or damaged. Duplicates are created and space gets wasted. As digital photography is now inside so many homes this has become a real issue for many of us. In the past we may have had physical photograph albums and negatives, where as now we have a hard drive. Our eggs are now all in one basket and it has become a worry. You could easily loose a precious image of great sentimental value. Perhaps something you can't ever replace? Worse case you could loose all your photographs in their entirety. If you're a pro or semi pro this could also have severe financial implications and affect your reputation and future business.
In this series of articles I'll cover how to organise your digital photographs, how to back them up and archive them and I'll also cover the image processing essentials to get from your original digital pictures to the best quality print you can manage. We'll start with what to do with your files before you even start work on them.
For the purposes of this exercise we'll assume you have taken your pictures. You are comfortably sat at your PC with your memory card clutched in your hand or your camera in it's docking station. The next thing you need to do is organise those files on the PC.
Preparing a place to store your images
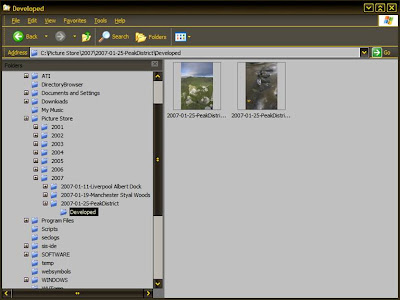
Step 1 - When copying the files from the camera card or the camera itself copy them into one central folder. This folder should be where you keep all of your images. This makes backups easier to setup as you simply remember to backup one main folder.
Step 2 - A good plan after step 1 is to create sub-folders named by year and then under these sub-folders create a folder for each group of shots you take. Name the shots by using a date coupled with meaningful names. Use these folders to organise your files in. A good format of folder name is yyyy-mm-dd-{Photo Name}.
Step 3 - In each sub folder have a folder named 'developed' or similar in which to save you processed images. Never overwrite the original unprocessed image files in case you damage them. Always work on the copies of your originals in the developed image folder. Saving them in a separate location like this helps instill the discipline of not using your original files. Your final file path for images may be something like:
PictureArchive\2007\2007-01-29-HadriansWall\Develops\{file names}
All your files can easily be batch renamed
Irfanview Thumbnail Viewer
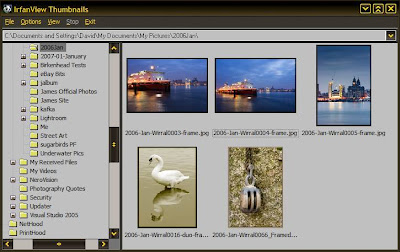
can batch rename files and allow easy and rapid viewing of thumbnails. Best of all this is totally free though a donation to the author is an option well worth taking with this excellent program.
Your files all contain 'meta data'. This is simply a part of the file which holds information about the file itself. In the case of your .mp3 player we're all already familiar with it as this is the part of the file that contains the artist name, track name, album title etc... We see it scroll on by as we listen to our favourite tune. In the case of picture files there is similar information available. You can, for instance, add the photographers name to a picture file. You can also add a description, title, copyright notice and camera information.
Most useful is the ability to add keywords. I'll explain myself. If you have a portrait of a monkey called John and keyword it with the words 'portraits, monkey, John'. What happens later in life when you have 20,000 pictures on your hard drive and need to find the picture file in a hurry? With keywords you can search for files containing the meta data 'portrait, monkey, john' and find your file instantly. As opposed to searching through years and years of files at random. Keywording takes minutes to do when saving your files from the camera and will constantly save you hours of stress in the future.
There are many tools to add meta data to batches of images. If money is an issue and performance is not then Microsoft do a very good tool for metadata editing.
Metadata editor screenshot

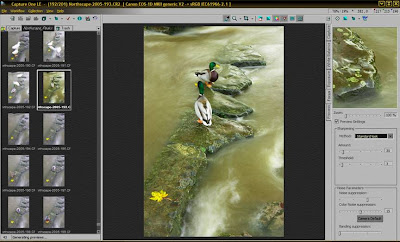
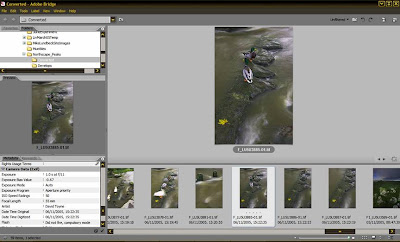
There are also solutions to copy your files to a location on your hard drive. Batch rename them and add keywords and details all within one program. The ones that spring to mind are Adobe Bridge, Capture One LE/Pro and Adobe Lightroom.
Capture One Pro or LE is a program designed to import and process RAW images as a batch it is also able to keyword and rename files. It's RAW processing abilities are second to none in my opinion. I'll cover its use in a separate tutorial at a later date.
Capture One Screenshot
Adobe Photoshop comes with the program Adobe Bridge which allows you to browse all your files as thumbnails, batch rename them, add metadata and keywords and also to send them directly to other programs to edit such as Adobe Photoshop or Adobe Imageready.
Adobe Bridge Screenshot
So at the end of this first article you should have a good idea of programs to use to organise and categorise your images. If you follow the advice in the article you should also have all your images stored in a manner where they can be easily found. No longer will questions about 'Where did I put that image of the cathedral in Liverpool I photographed in April last year?' be an issue. It'll be in the 2006\April\ folder and you can search for the keywords 'buildings, cathedral, Liverpool'. What was a stress is suddenly transformed into satisfaction.
Next time we'll look at back-up strategies to stop you loosing your images.


1 comment:
Good one, plenty of good advice and lots of free software too. I have heard lots of good things about Ifranview, must check it out sometime.
Personally I use Downloader Pro to do the downloading, file renaming, keywording, directory creation and backup automatically. Worth checking out.
Chris
Post a Comment